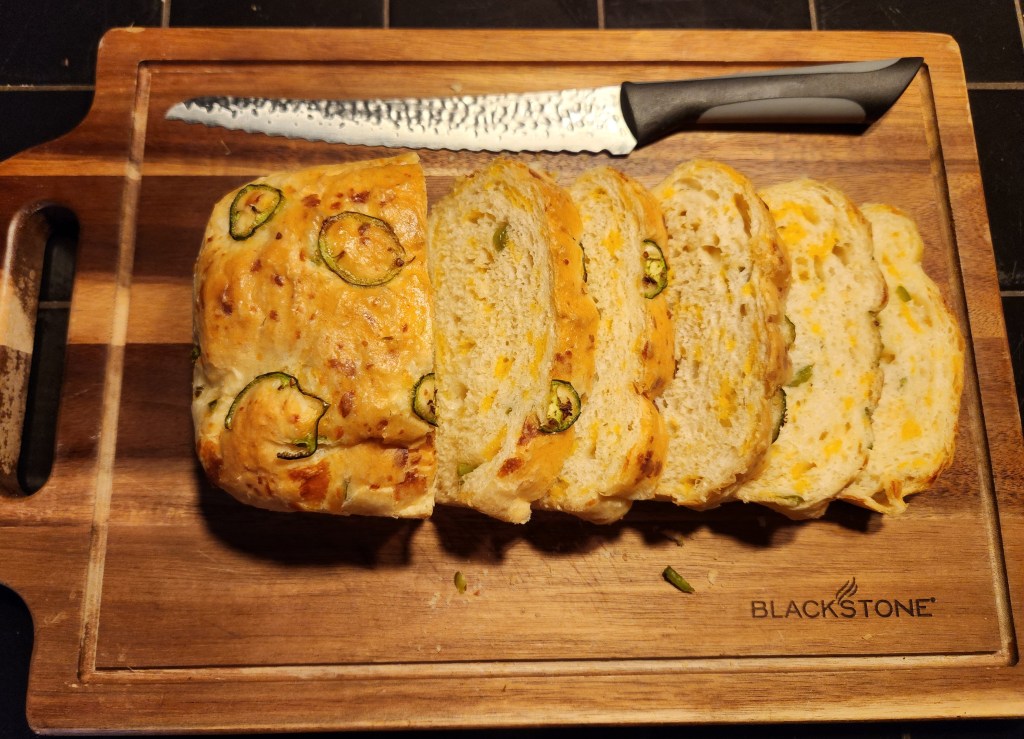
My husband and kids absolutely love homemade jalapeno cheddar bread. it truly has become a staple in our kitchen and disappears almost as fast as I can bake it! The bold cheddar and just the right kick of jalapeno make it flavorful and comforting, while a recent discovery has taken it to the next level: adding buttermilk! It makes the bread extra soft, moist, and perfectly tender every time. Whether we’re enjoying it fresh out of the oven with a pat of melting butter, slicing it up for toasted cheese sandwiches, or serving it with a scoop of chicken salad, it always hits the spot. There’s something about the warmth and spice that brings everyone to the table. It’s also a consistent best seller at the farmer’s market. Customers come back week after week just for a loaf (or two!).
Notes (that you don’t have to search for!)
- First–The next set of directions are in-depth. If you scroll to the bottom after the final step, there is a list of consolidated instructions that more seasoned bakers can use. Follow the in-depth directions if you are newer to baking bread 🙂
- I know when I first started baking, I wanted as many pictures and steps as possible. I took pictures step by step to align with each direction to make as user friendly as possible.
- I normally bake in metric unless absolutely necessary, but I did my best to convert to commonly used U.S. standard.
- Any cheese can be substituted I just recommend that any cheese used is NOT pre-shredded. It will not melt as nicely due to anti-caking agents.
- This is a master recipe that can be interchanged with any combo, this is just our favorite, For sweet loaves, up the sugar by double, possibly more depending on what ingredients you are adding and how sweet you like your bread.
- For seasonings and spices, I will say that I measure by pinches or sprinkles and looks.
- Kneading, more is not always better, but less is also not more. Time frames and home temperatures differ for everyone, so try to ‘feel’ your dough and not go by time.
- Consistent cuts with ingredients can ensure consistent bakes and will ensure large pockets do not happen, especially with cheese.
- If you do not want to use honey, just sub whatever sweetener you like, whether liquid or granulated. I have used sugar when I was out of honey and nothing changed.
- I HAVE open baked this recipe before, but it does significantly better in glass pans.
| Ingredient(s) | Amounts (Metric) | Amounts (U.S) |
| Glass Bread Pan X 2 (9X5) | 2 (makes 2 loaves) | 2 (makes 2 loaves) |
| Bread Flour | 675 Grams | 5 1/3 Cups |
| Sharp Cheddar | 16 oz Shredded | 16 oz Shredded |
| Jalapenos | 3 Finely Diced/1 cut into Slices | 3 Finely Diced/1 cut into Slices |
| Yeast | 10.5 Grams | 1.25 Tablespoons |
| Raw Honey/Sweetner | 60 Grams | 1/4 Cup/ |
| Filtered Water | 360 Grams | 1 1/2 Cups |
| Buttermilk | 120 Grams | 2/3 Cups |
| Olive Oil or Melted Butter | 25 Grams | 3 Tablespoons |
| Sea Salt | 2 oz | 2 oz |
Directions
Step 1:
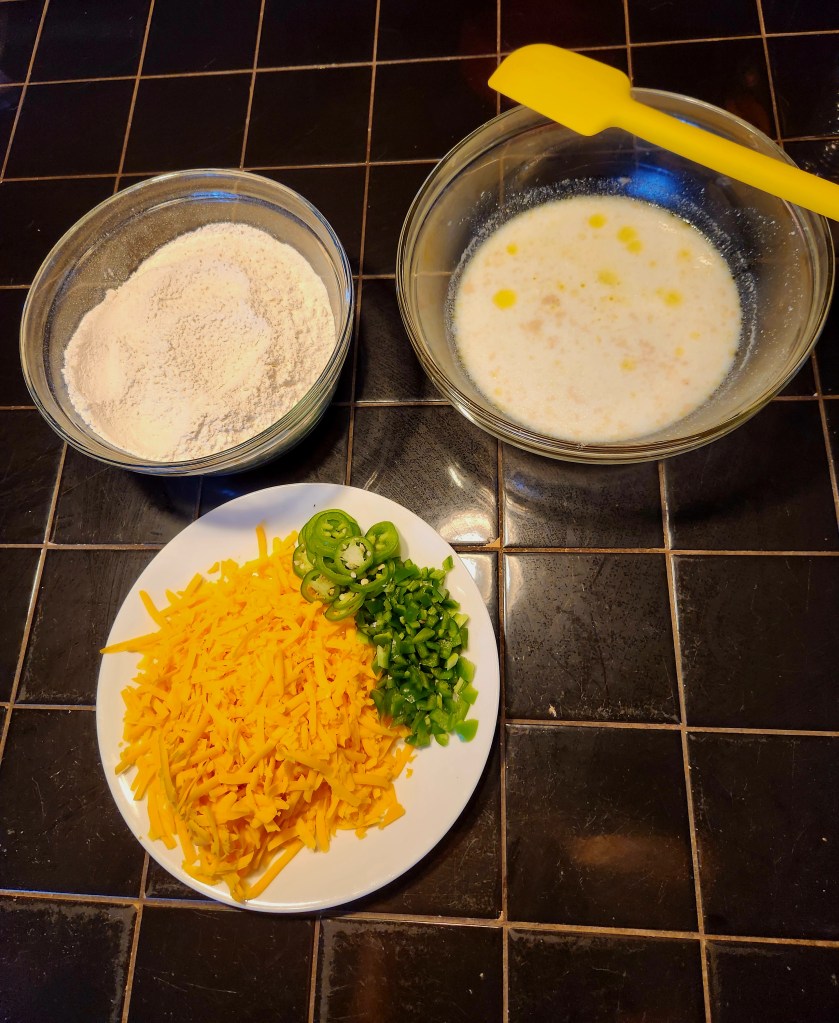
Get necessary bowls and ingredients collected. I use two large mixing bowls and a dish for the shredded cheese and jalapenos. Weigh flour and salt in the larger bowl and the yeast and honey into the other bowl.
The buttermilk, oil or butter and water will need to be heated to a lukewarm temperature. I usually test it by a finger touch. Should be slightly warmer than warm. Pour warm mixture into the yeast bowl.
Shred cheese on a thick setting. Dice and slice Jalapenos.
Step 2:
Let yeast and warm mixture sit or ‘bloom.’ This should take about 5-7 minutes. The mixture will turn puffy and foamy. At the very least the yeast will rise to the top. Depending on the temperature of the mixture, it may be slightly more or less time. If your yeast does not bloom, check your date. If it is expired, it will be inefficient. If your water is too hot, it kills the yeast as well.
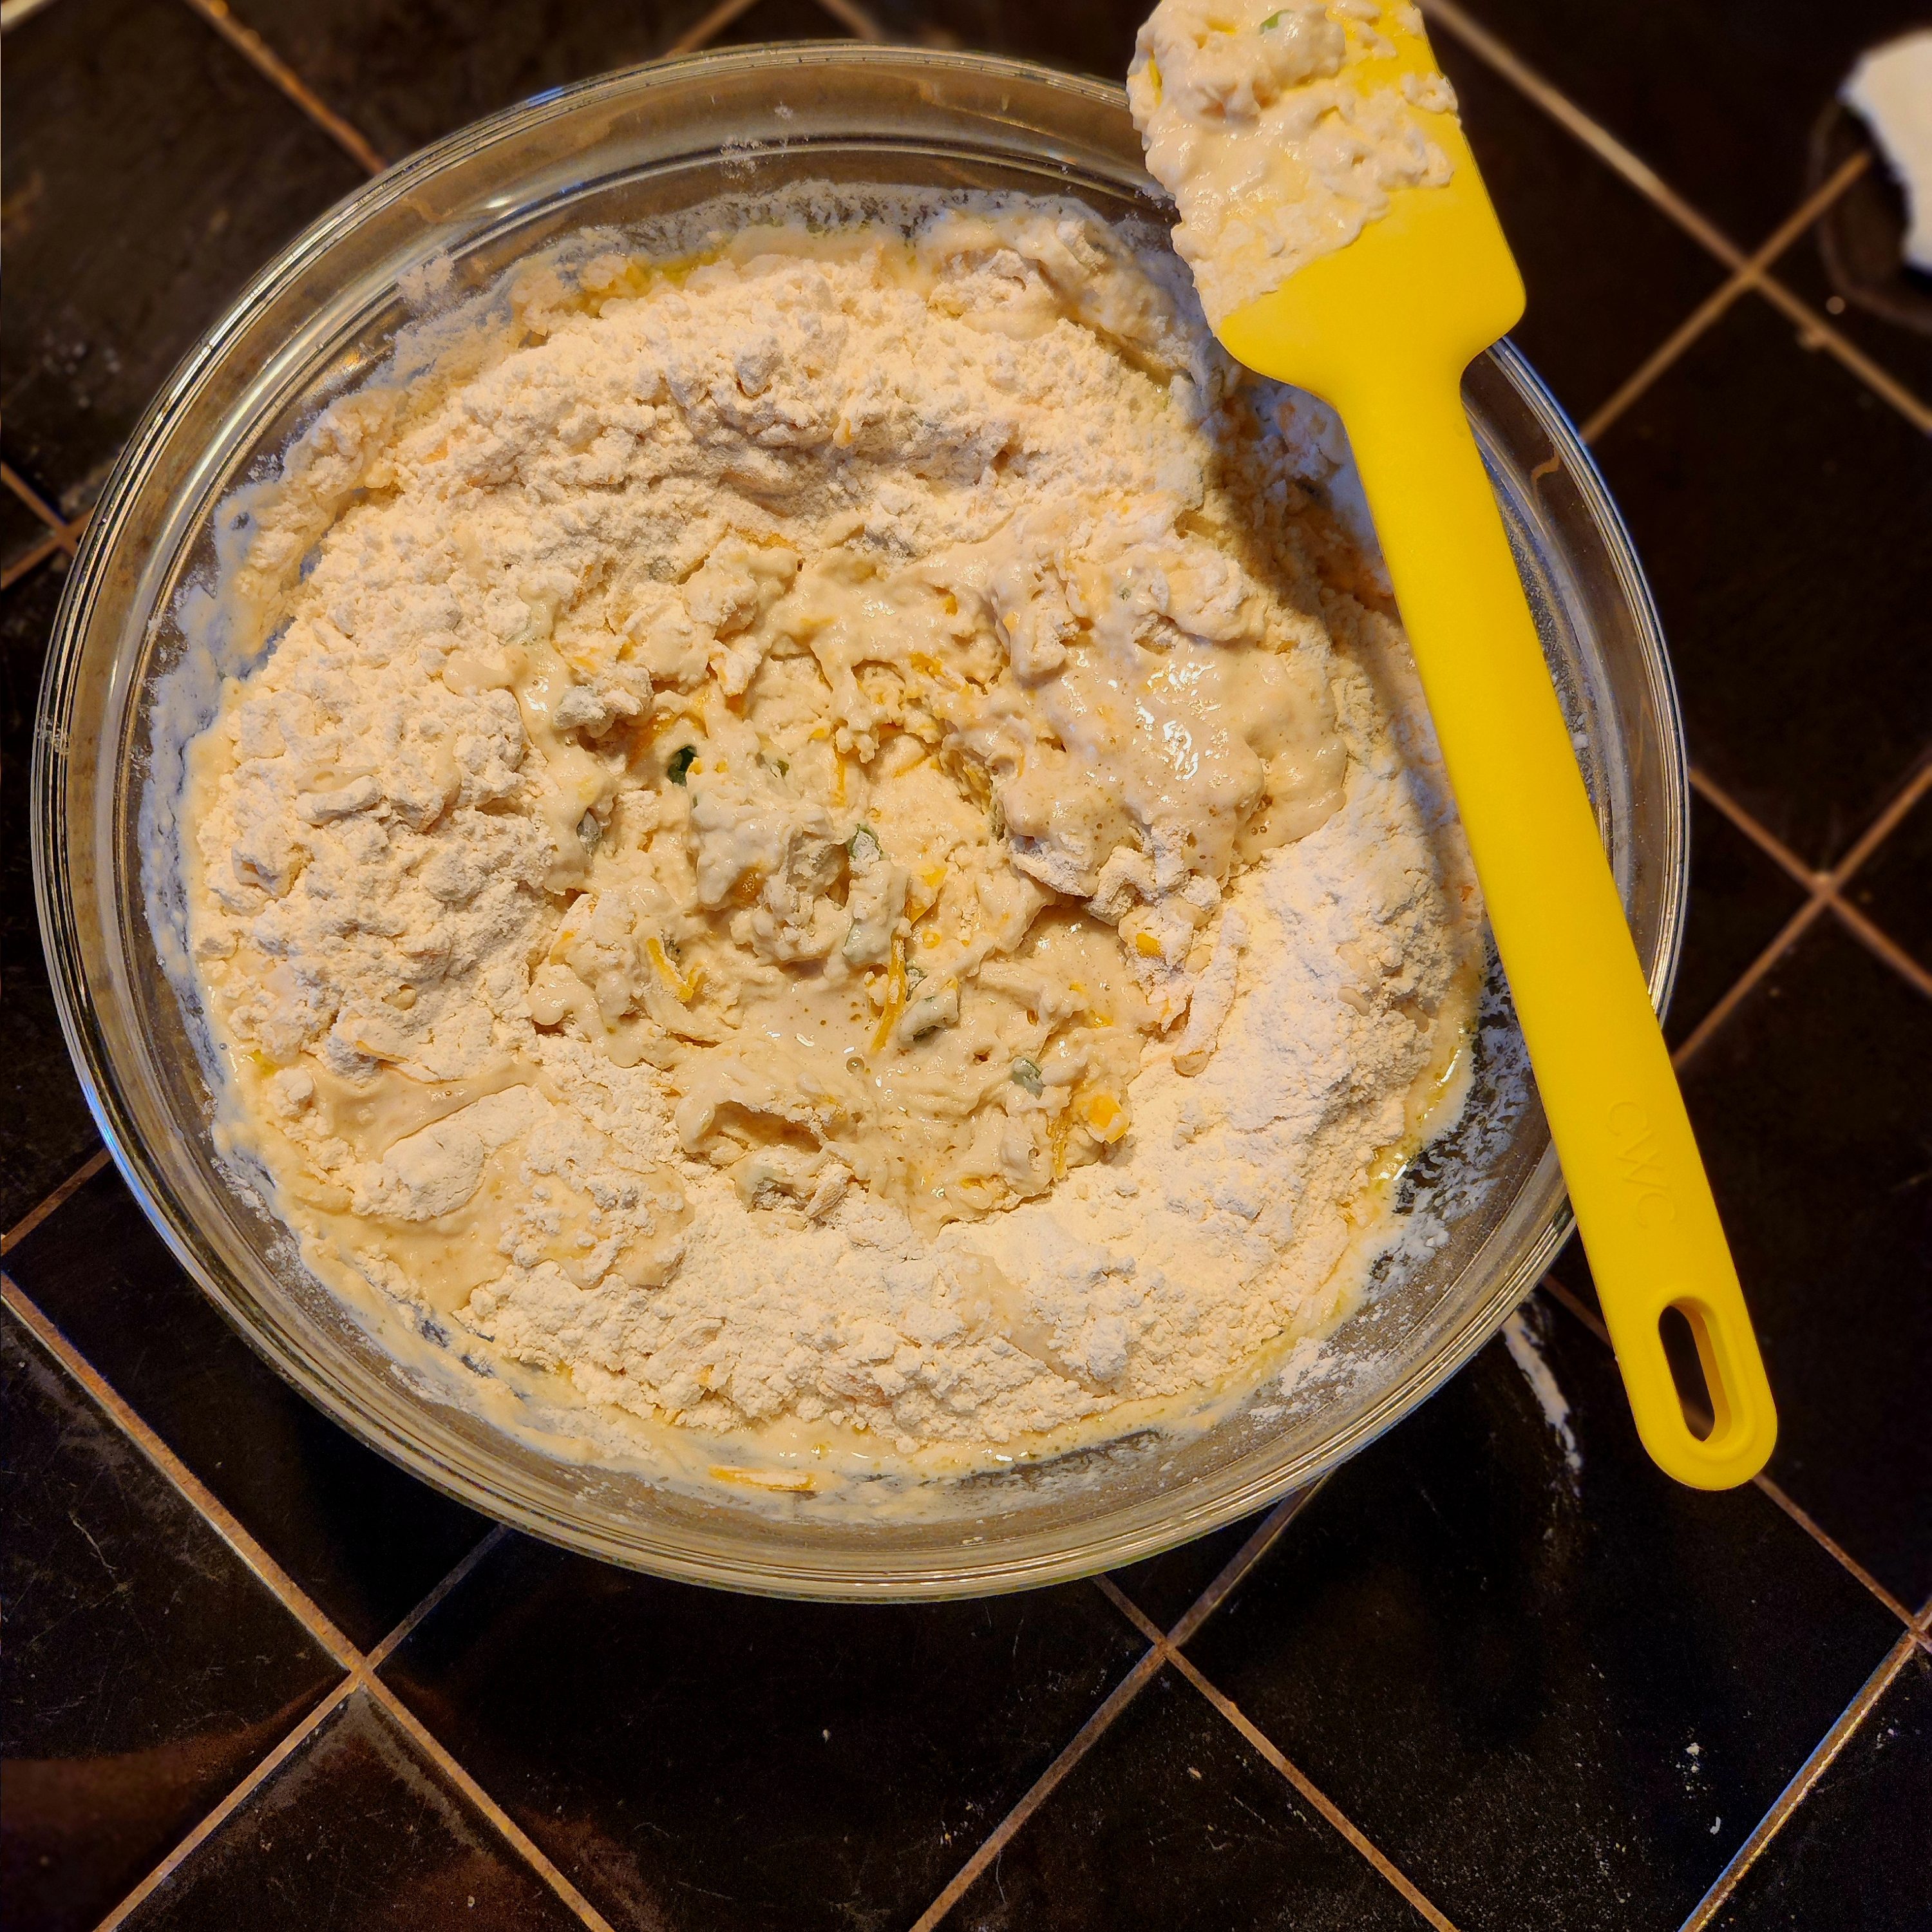
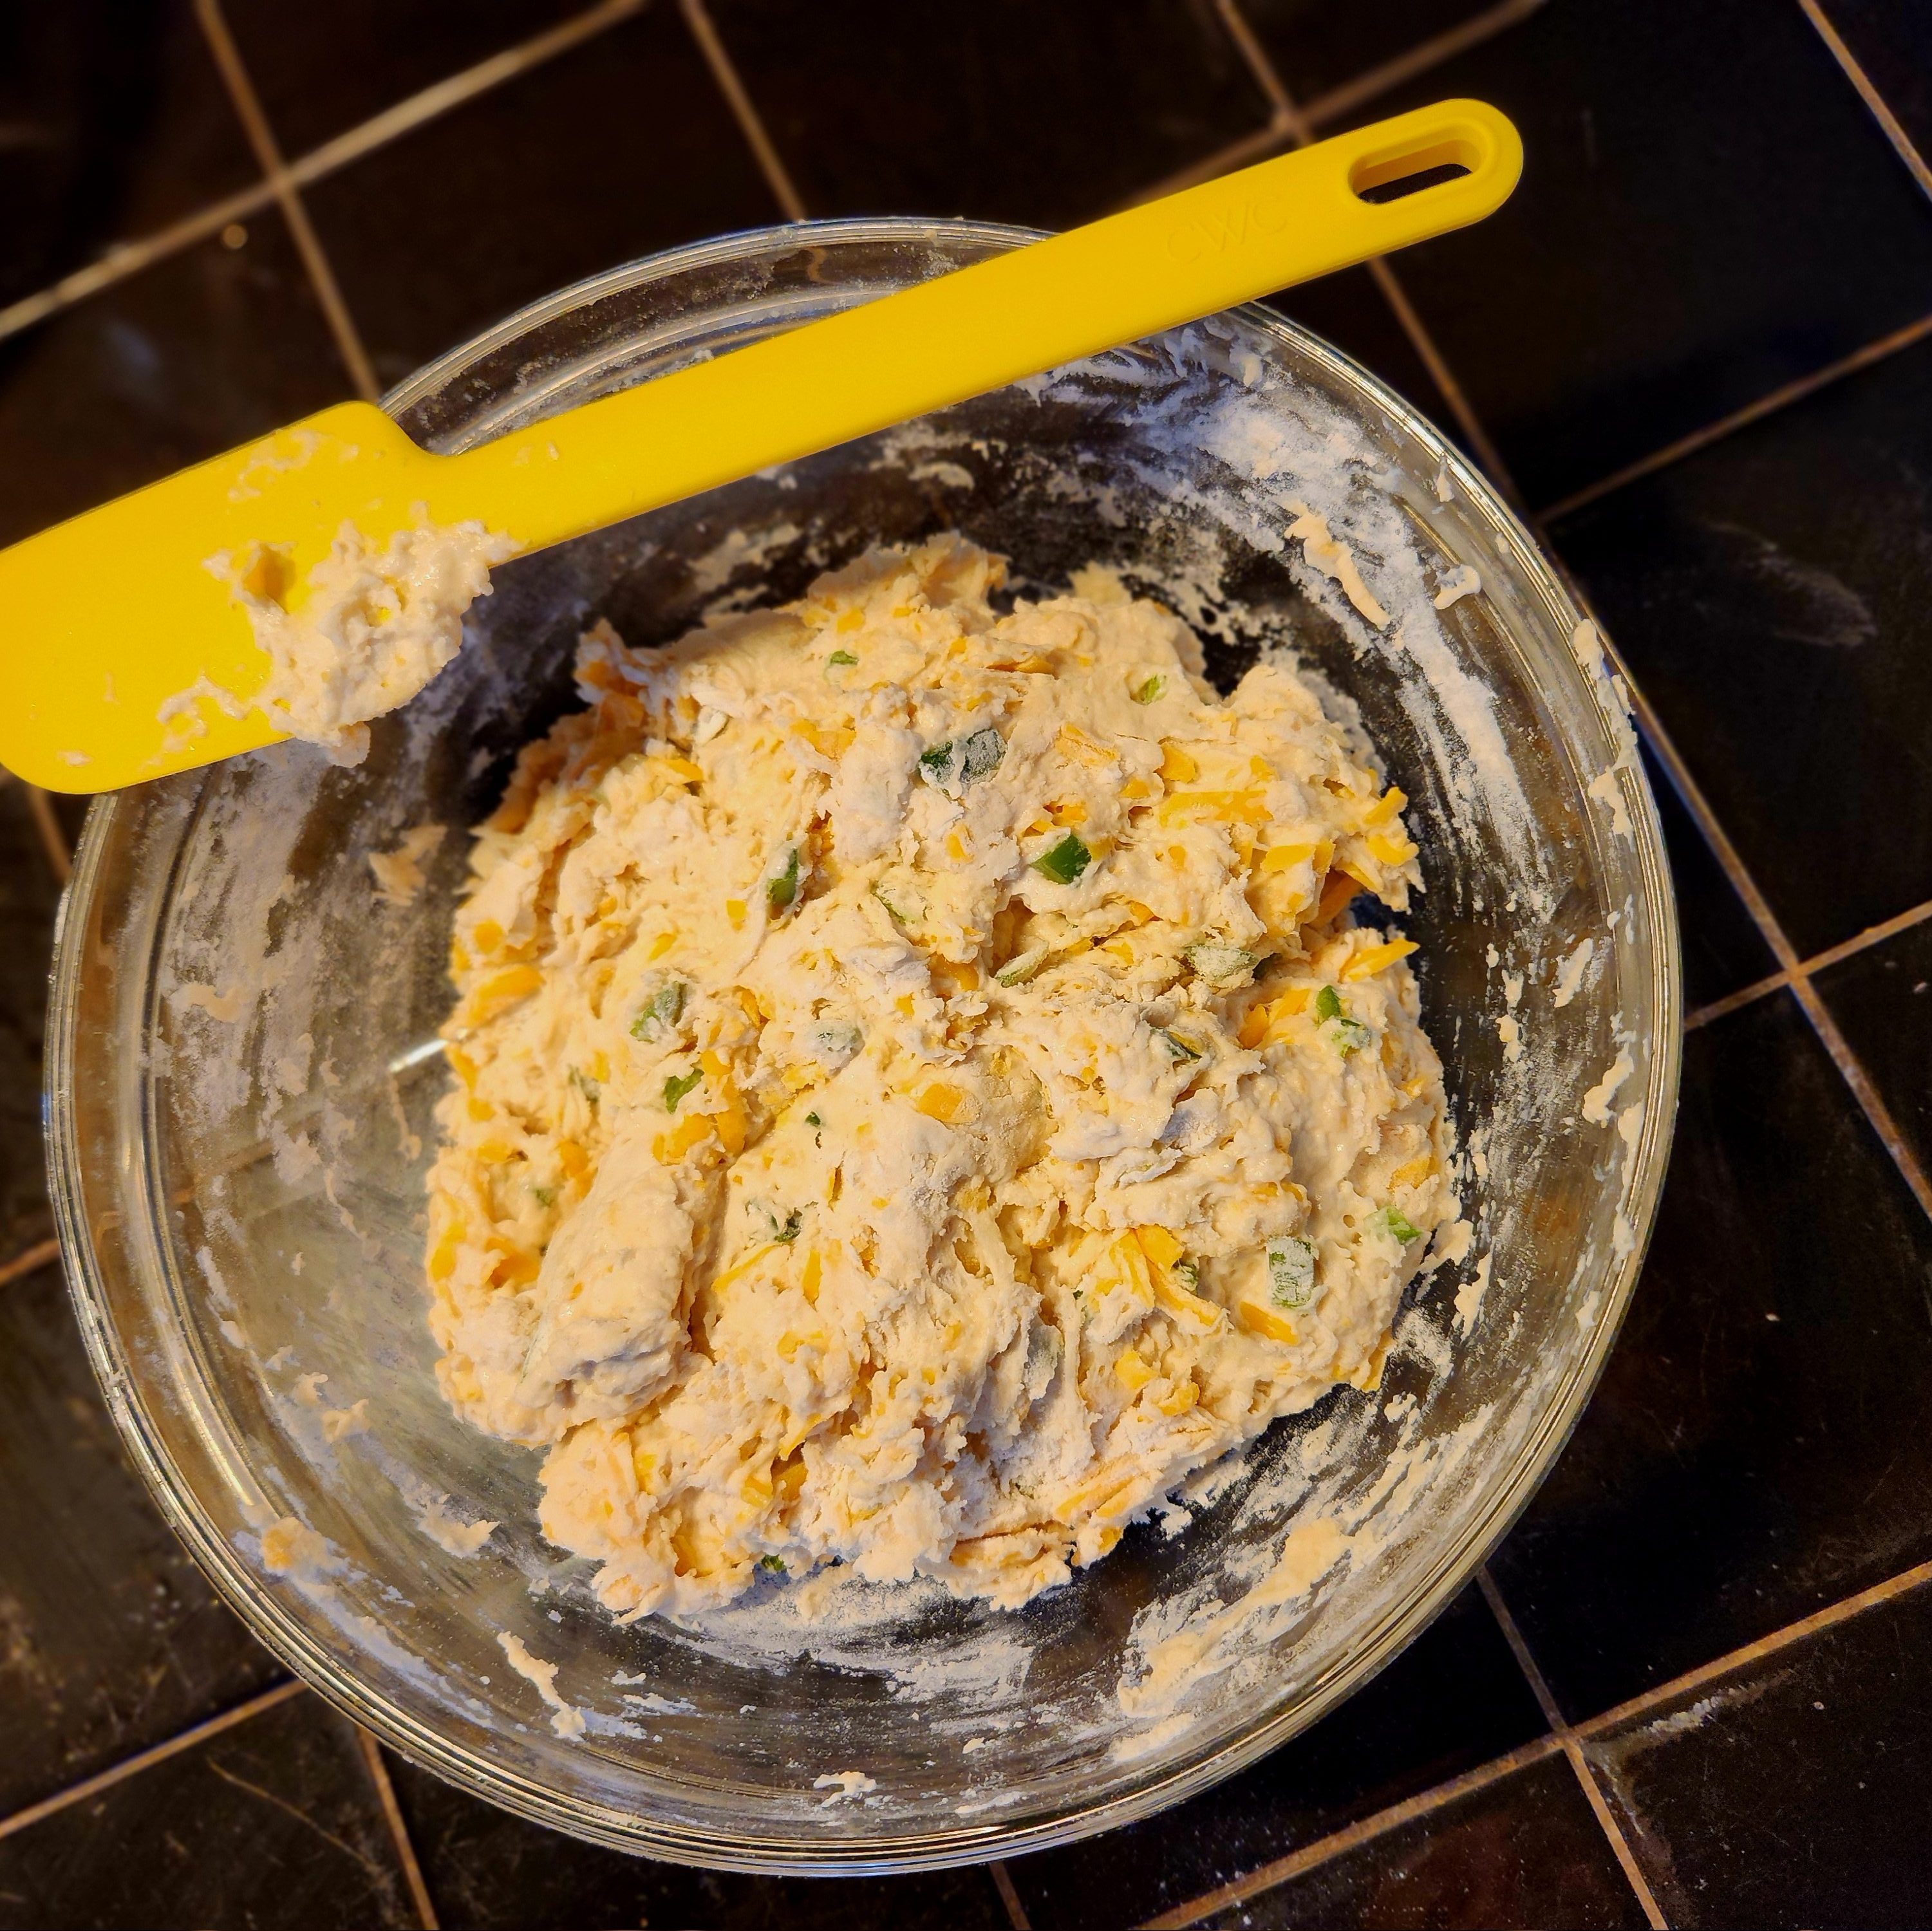
To help get an even mix, I mix the diced jalapenos and shredded cheese into the flour to coat the ingredients.
As the yeast mixture fully sets, create a well into the flour bowl and pour wet ingredients into the bowl. Mix until shaggy and let rest 7-10 minutes.
Step 3:
Pour onto bench that you will knead on. This can be a cutting board, your countertop, or silicone mat.
This is the part where your dough will go by feel and look. You want your dough to be firm, elastic and not shaggy. The dough should be cohesive, not super sticky and start forming a ball with each kneading movement.
Some notes for this. Depending on humidity, add a little more flour if the dough is too sticky. Yes, I know, it sounds crazy, but it can make a difference. Do not add too much flour, just enough to not coat your hands. Another note is wetting your hands to get the dough to a point where it is not super sticky. Adding too much flour, even on your hands, will create a dry, dense bread.
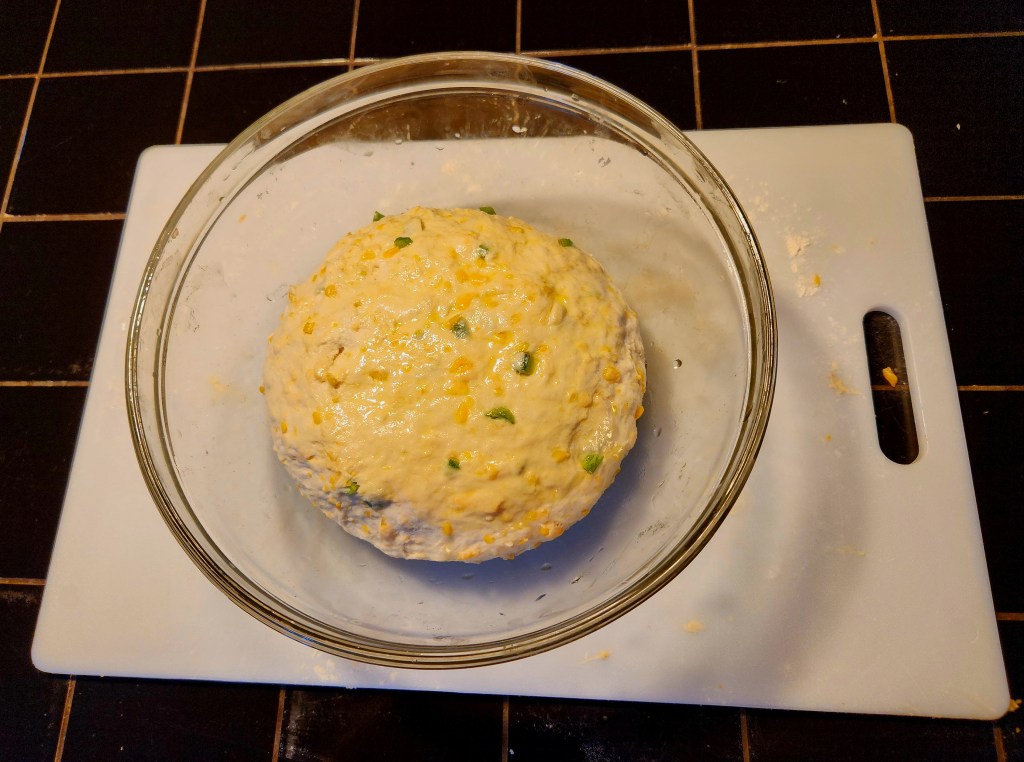
Once you feel your dough is ready, form into a final ball. Add about a tablespoon of olive oil to a clean bowl. Lightly toss both sides and let seam side down rest bottom down. Cover with a towel or saran wrap and let rest in a warm area for UP TO 1.5 hours. Be careful and again, watch your dough, you want it to get close to double. It is okay to be slightly under as there will be a second rise. But if you over proof, it will fall when baking.

Step 4:
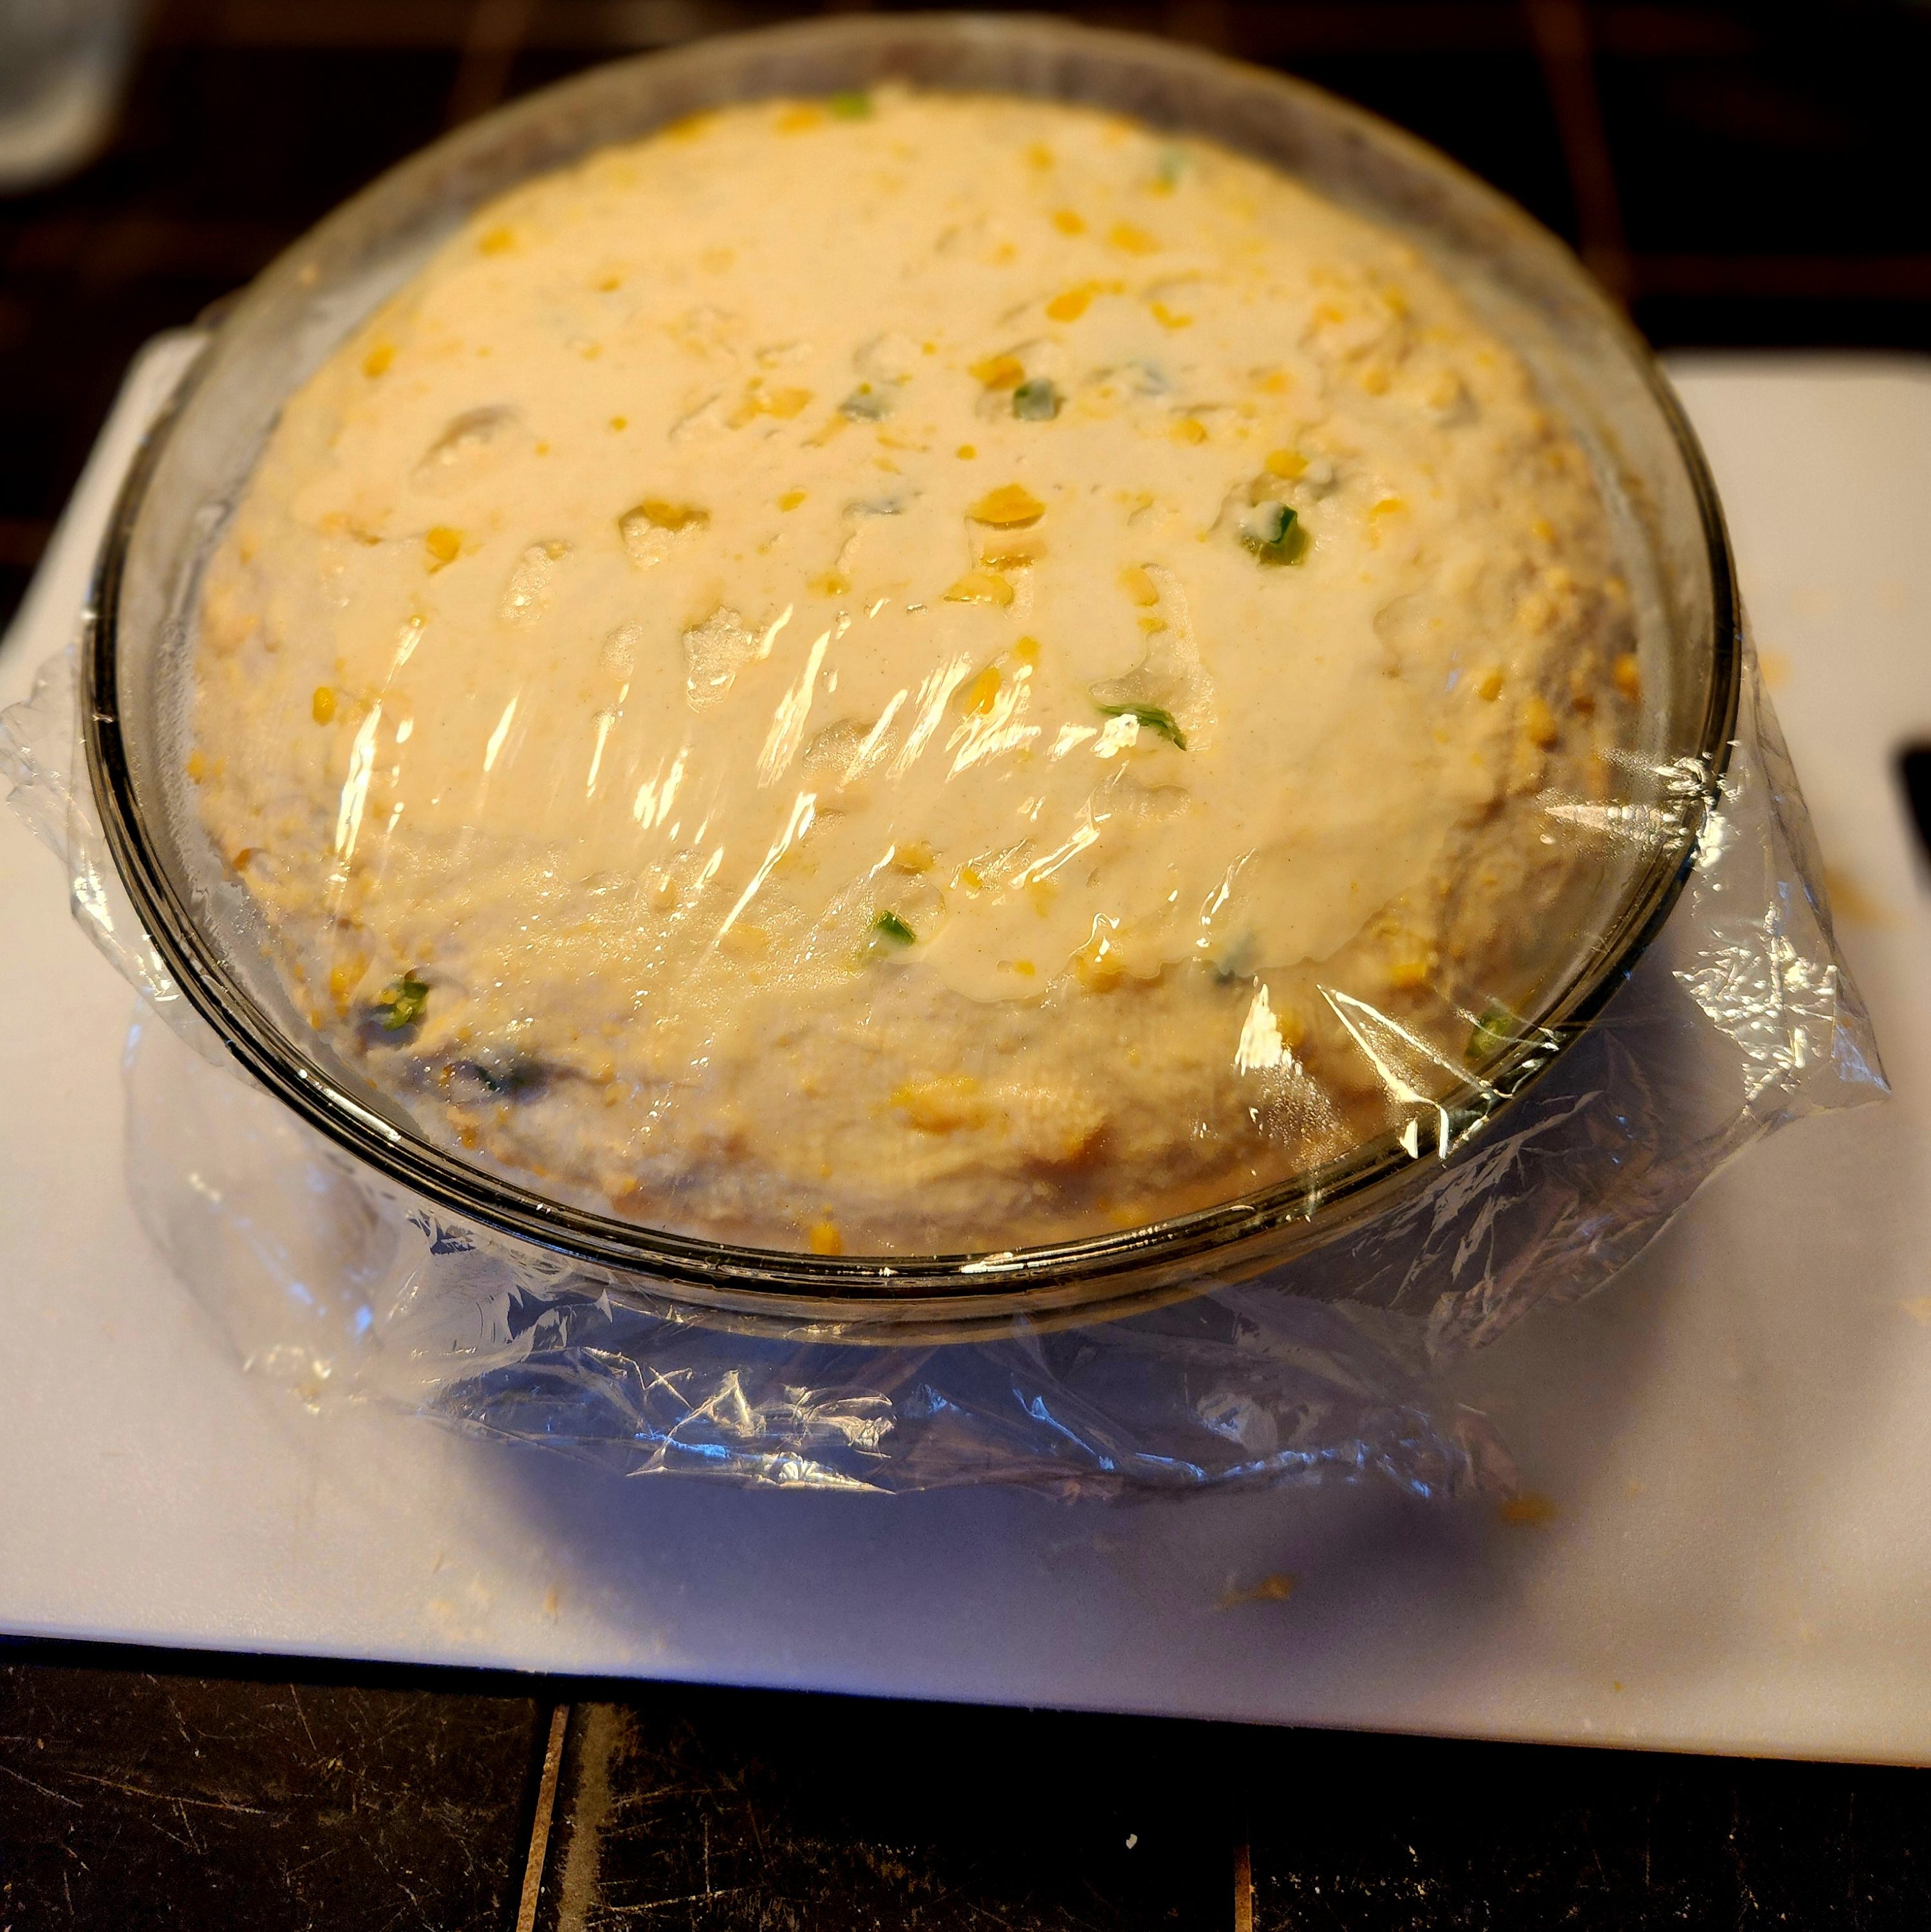
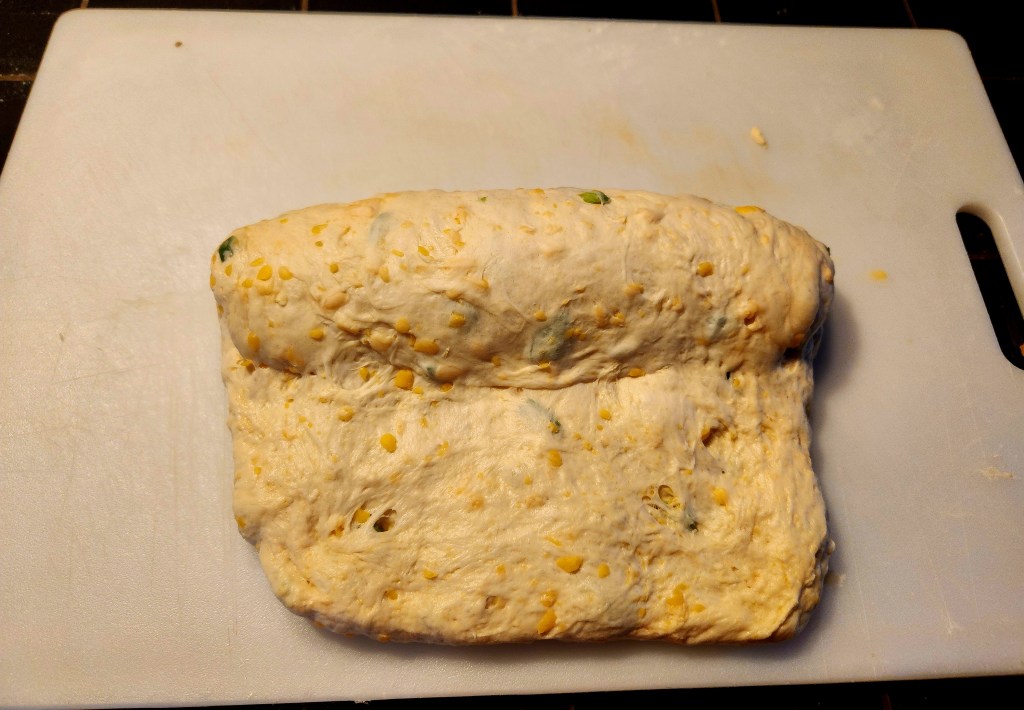
As the picture below shows, this dough has risen significantly to about double. Not only do you want to go by rise, but the dough should feel airy and jiggle when shaking the dish. For reference, my kitchen is about 72 degrees in the summer and takes about 80 minutes to be at this point. Yours could be more or less time, just keep an eye on it until you know how your dough reacts in your climate.
When you are certain your dough looks like the below picture, pour out onto your kneading place. Separate the dough into two part. I usually weigh mine. The total for this batch is 1422 grams, so I make two 711 gram balls. Weighing is not necessary, but I have found even the smallest difference in weight can create two different breads.
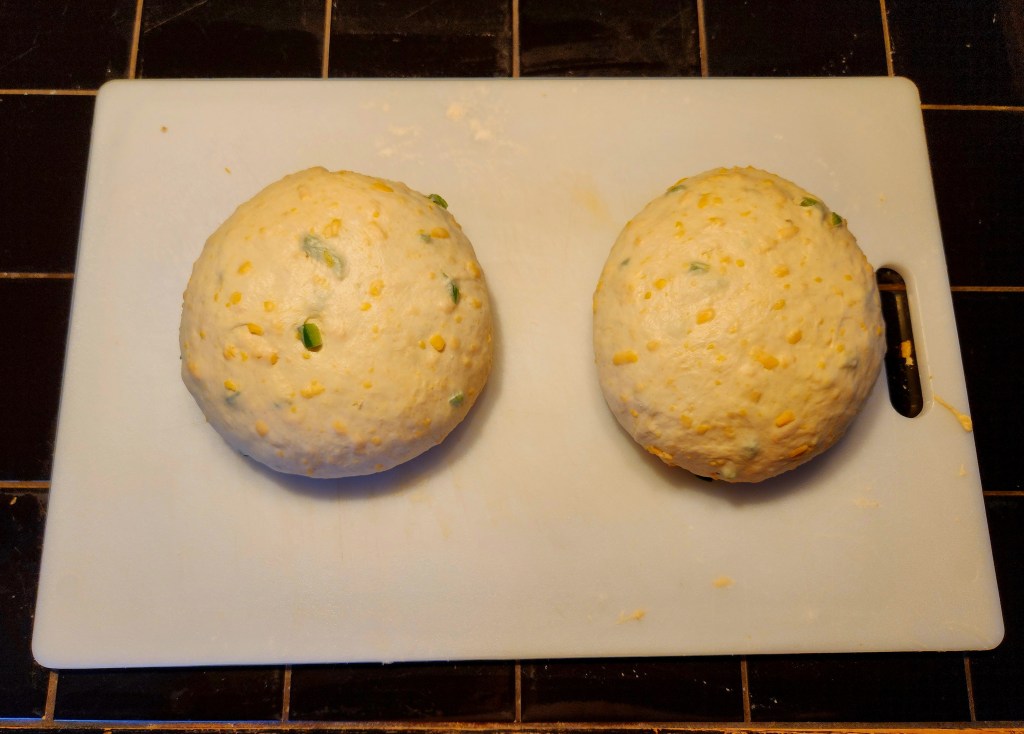
Form into two, nice balls. To do this, I do a tuck, pull and turn motion. Until you are more comfortable, a bench scraper really helps create tension and create that tuck, pull and turn motion. Once these balls are firm and have nice tension, let rest for 15 minutes.
While the balls rest, grease your glass pans corner and top to bottom. I would say this does not NEED done, but it creates a crispy outer layer. I use a tiny pat of room temp butter. Pre-Heat to 360 degrees at this time.
Step 5:
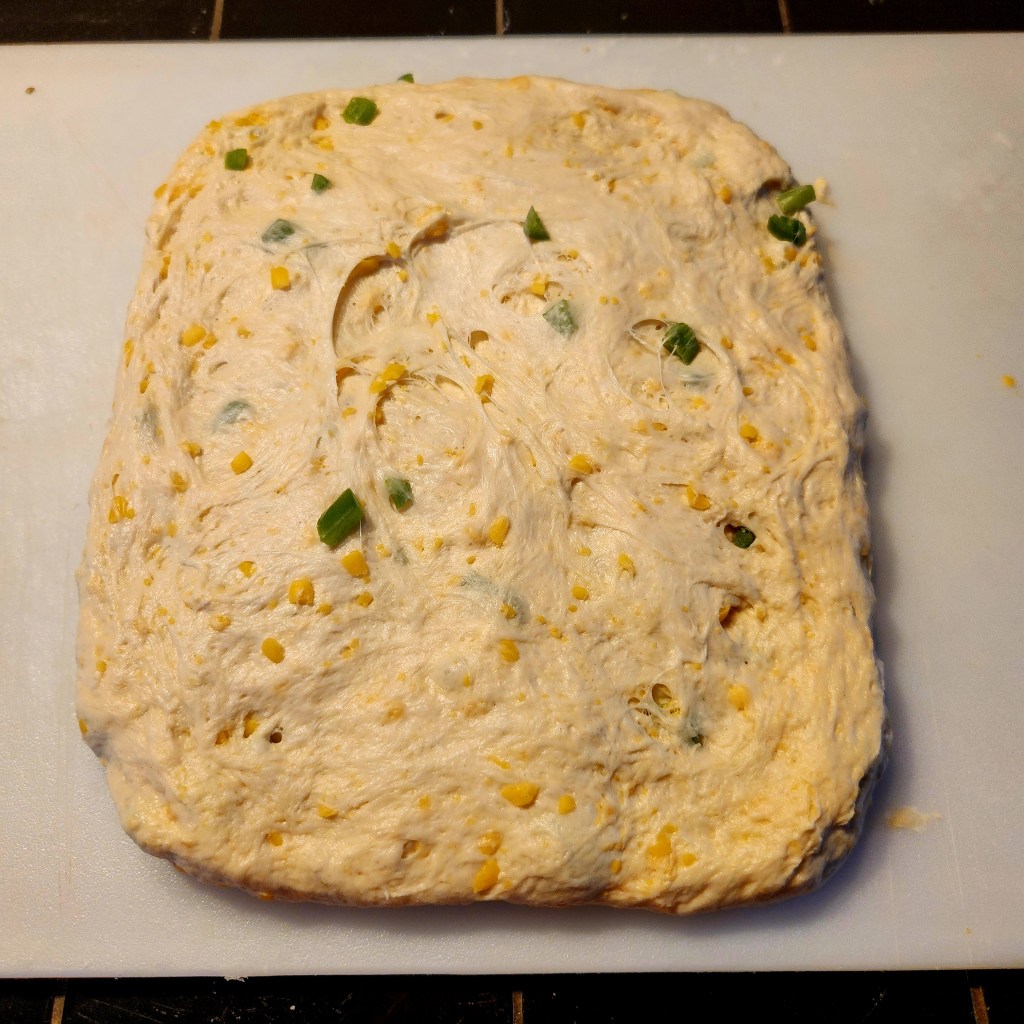
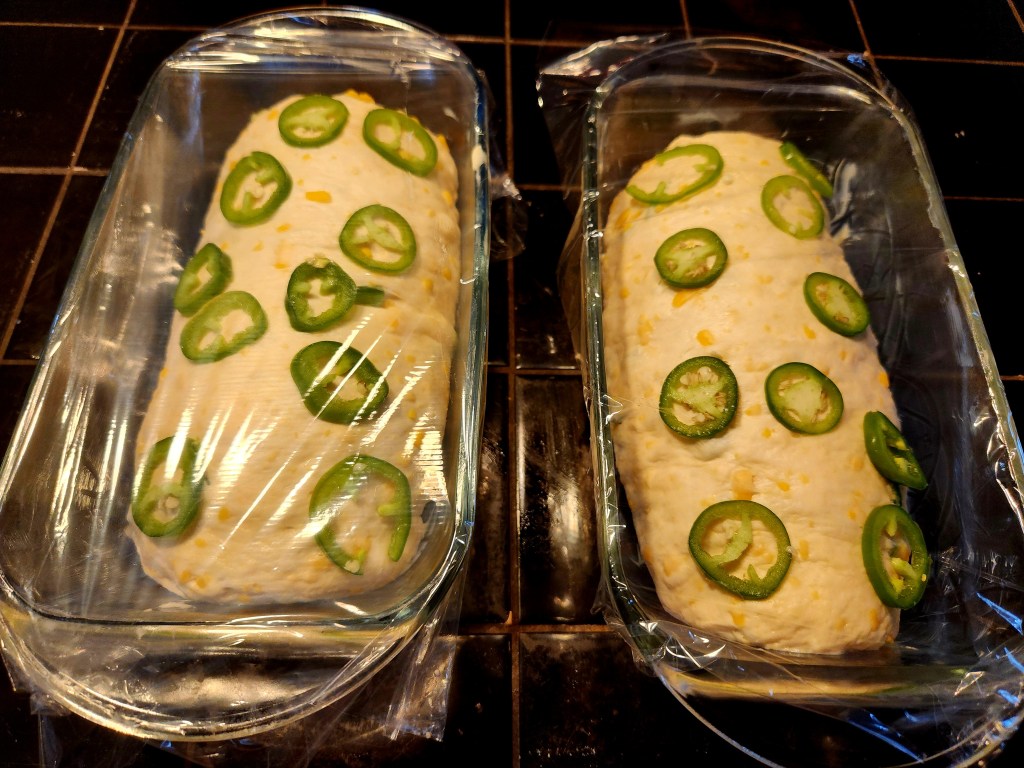
Once your dough balls have rested, about 7-10 minutes, they should be soft again with much less tension. With this, we want to stretch and flatten them into rectangles that are slightly smaller than the glass pans and about 12 inches long. Once we have a rectangle, you want to do a jelly-roll type of fold 3-4 times with the seam being the final roll, connecting top to bottom.
Reminder: I would recommend not using a rolling pin. Using a rolling pin may flatten or tear the dough. We want to retain as much air as possible in this step. I simply just flatten the ball and gently stretch and pull. If the tension has lightened enough, it should be a very quick and easy motion.
Once we have the rolled dough, gently pick up as a whole and place in greased pans. Add the sliced jalapenos to the outside layer. Saran wrap and let rise for another 30-45 minutes.
Step 6:
Ensure your oven is at temp of 360 degrees.
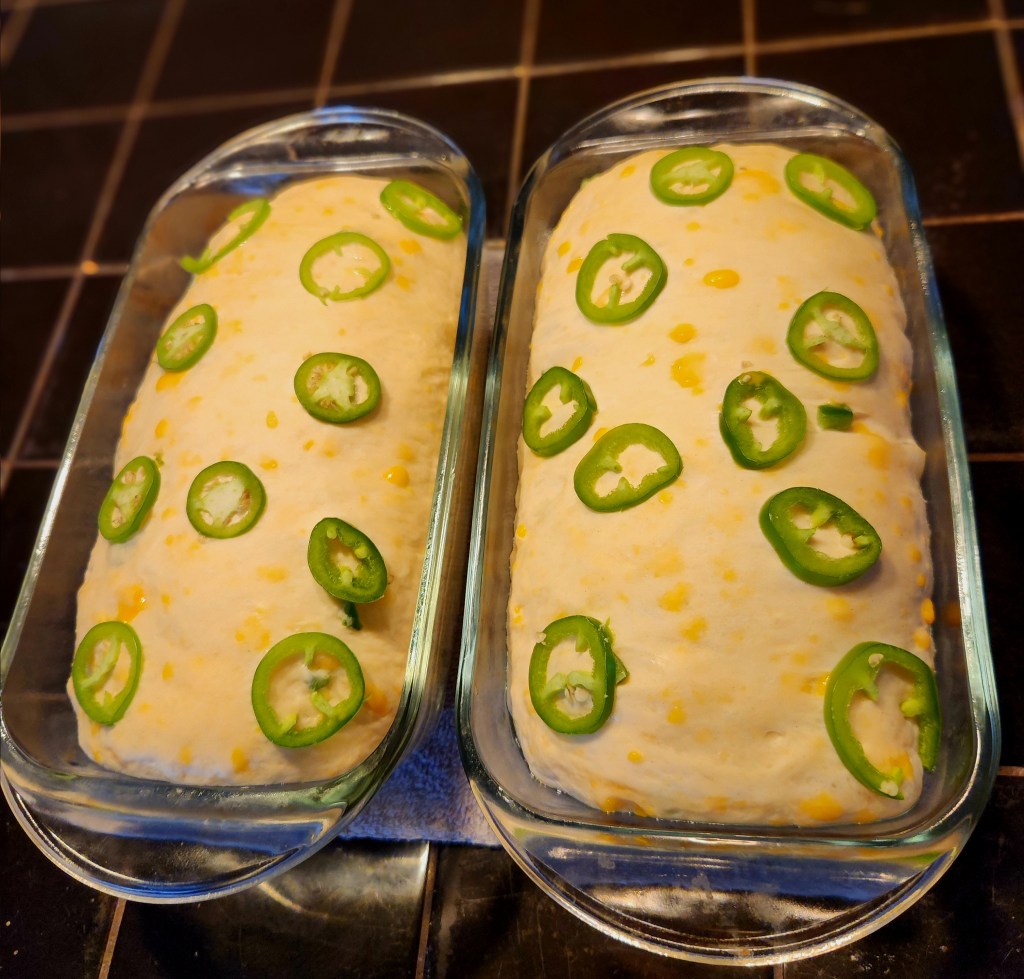
To see if the dough has successfully risen a second time, your dough should again have doubled in size and should be right below the edge of the glass pan. Along with the rise, you want to gently shake the pan and the dough should be light, fluffy, and jiggly.
Keeping an eye on this part of the rise is important because if the dough does not rise enough, it will be not as fluffy as it can be. Over proofed and it will have large air pockets where the dough starts to fall during the rise in the oven. If you are unsure, slightly under is always a better choice.
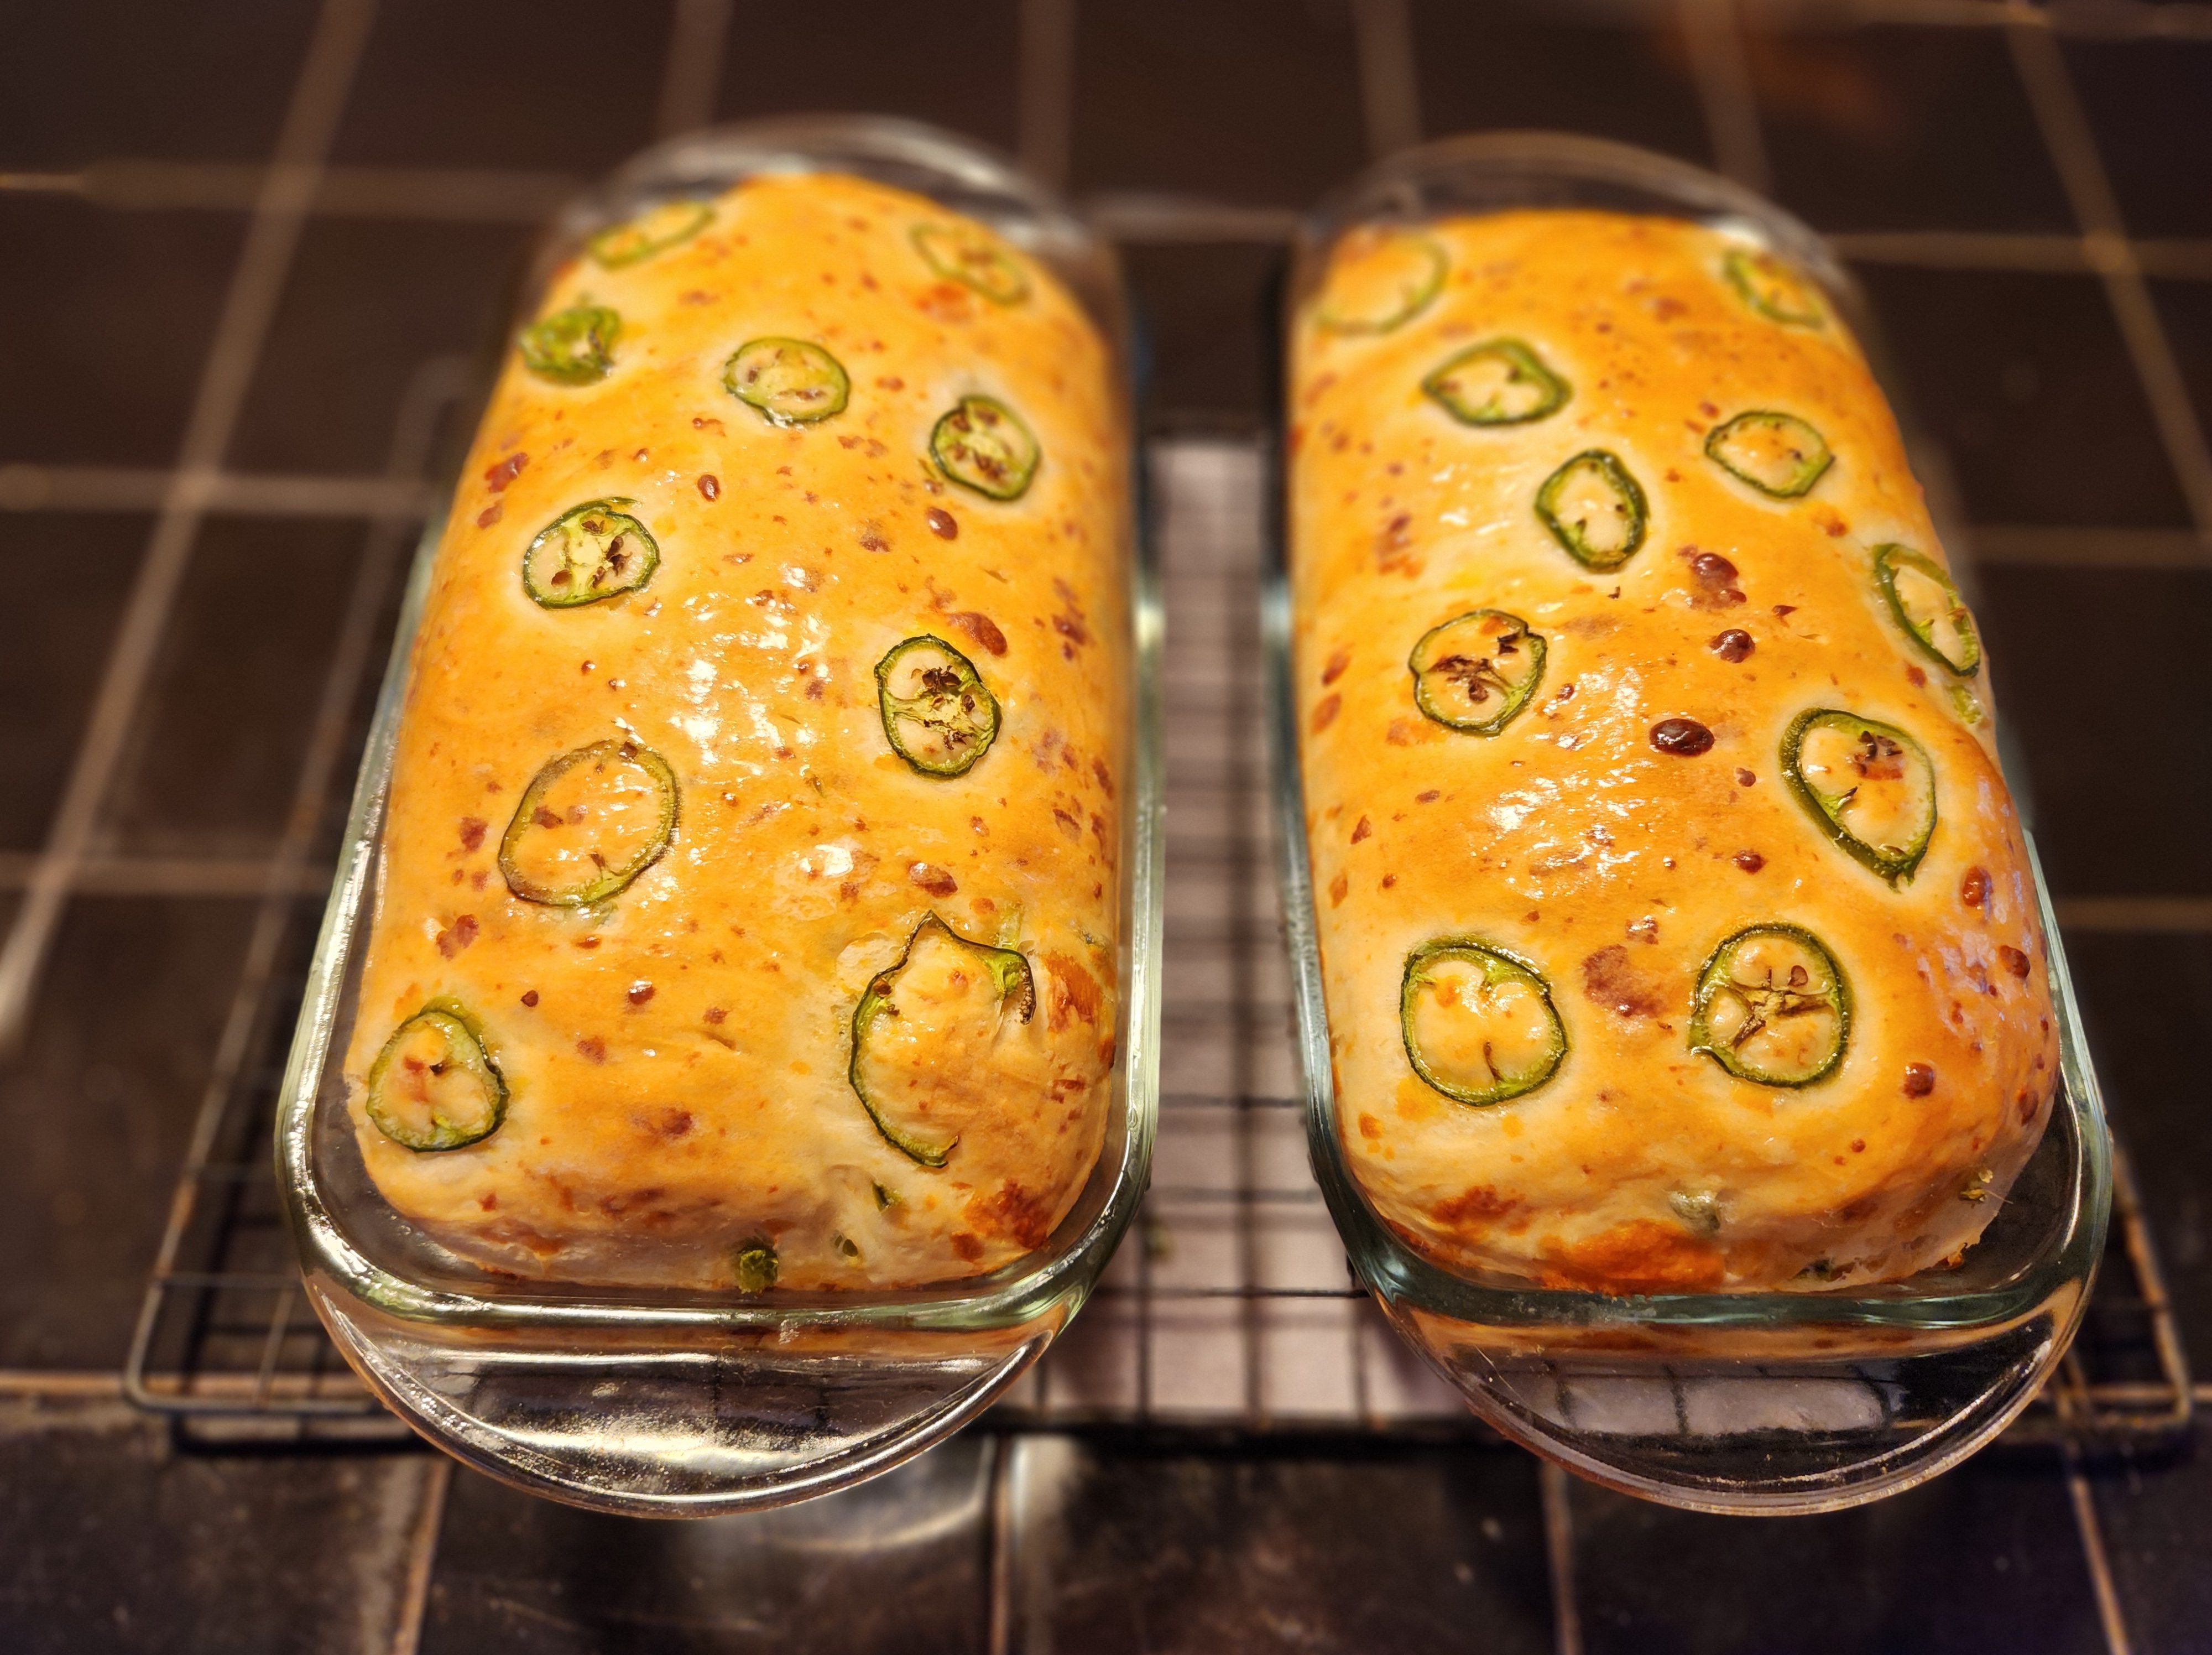
Bake at 360 degrees for 20 minutes. Drop the temperature down to 350 for another 20-25 minutes. You can adjust the 360 time for lighter or darker bread. If you want it lighter, drop to 350 around 15 and let bake until done.
To test doneness, you can tap the bead and should make a hollow noise. You can also stick a toothpick or something tiny into the center. It should come out clean. total time should be 45 minutes.
I cool on a baking rack for about 5 to 10 minutes. Then I dump out and let cool the remainder. You DONT HAVE TO WAIT and can cut after about 15 minutes for warm, fresh bread with as much butter as you desire.
Consolidated Directions:
Step 1: Warm buttermilk, water and oil/butter to a slighter warmer than warm temperature.
Step 2: Mix flour and salt into a bigger bowl.
Step 3: Mix Yeast and sweetener into a smaller bowl. Pour warm mixture into this bowl.
Step 4: Let Yeast mixture bloom. 5-7 minutes. Should be risen, fluffy and active.
Step 5. Shred cheese and cut jalapenos. Add to flour mixture and effectively coat.
Step 6: When yeast mixture is done, create well in flour mixture. Pour in wet mixture.
Step 7. Gently mix and stir until shaggy. Let sit for 5-10 minutes.
Step 8. Pour shaggy mixture our. Knead until elastic and whole. About 5 minutes. Form into tight
ball. Add oil to a clean bowl. Coat ball and cover for around 80-90 minutes until double.
Step 9: Pour out and divide into two even balls. Slightly shape and let rest for 15 minutes. Grease pans.
Step 10: Form into rectangle and jelly roll into a shape of a loaf. Slightly smaller width than the pan.
Add sliced jalapenos to top of loaves once they are in the pans. Cover and let rest up to 45 minutes or until doubled. Pre Heat Oven at this time to 360.
Step 11: Bake at 360 degrees for 25 minutes. Drop temperature down to 350 for remainder of cook time.
Step 12: Confirm temperature and color is done for you. Let rest on cookie sheet. Pour out and cool completely.
I hope everyone’s bread turned out amazing! If there are any questions or concerns, please leave a comment and I will get back with you 🙂

Leave a comment